| One of
my recent restoration projects was on a Scalextric March Ford, where the
rear chrome motor section had several parts broken off. This page shows
you step by step how I restored it back to something close to the original
shape. Unfortunately, I neglected to take a good photo of the "before"
piece, but it was missing the exhaust pipe and bracing arm on the left
side and the radiator fin and support and linkage arms on the right. This
piece was repaired using some 1/8" plastic tubing and a piece of
"H" channel (from which I cut out all the arms and other pieces),
for under $7 from a local hobby shop, and glued together with a 2-part
epoxy glue called "araldite" here downunder.
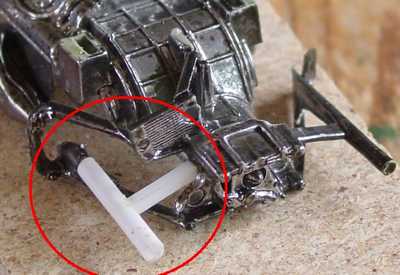
| Step 1. Rebuild Exhaust
This was the simplest repair. I filed the broken end of the exhaust
square, then measured and cut a piece of 1/8" tubing to fit.
Then measured and cut the plastic support arm from one side of
the H channel. To reinforce the joins, I drilled a fine hole 1/8"
deep into the broken off exhaust section, and glued a 1/4"
bit of brad (very small nail), into the hole I drilled, then glued
the piece of tubing over the top. I also cut out a very small
piece of the tubing where the support arm meets it, and embedded
the arm into it, to strengthen that join too. |
|
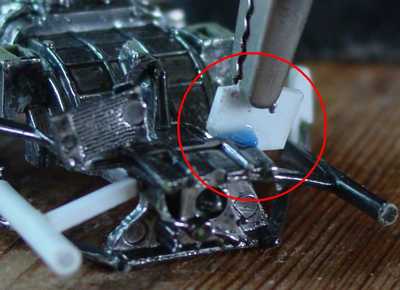
Step 2. Supports for Radiator Fin and Linkage Arm
It is difficult to see from the pic, but the fin broke off and
took with it a triangular section of the part on which it sits.
I had to cut and file a piece of thicker (blue) plastic to shape
and glue that in place first to give the fin a level resting point
and fill in the gap. At the same time, I also cut and shaped a
small piece of plastic to replace the broken vertical linkage
section. I deliberately made this piece a little thicker than
the broken off section, so it had an extra bit of an overlap for
reinforcement, otherwise I would have had a very small gluing
surface. |
 |
Step 3. Attach New Fin
The next step was to make up a piece for the fin. I couldn't
easily reproduce the textured finish, so didn't even bother trying.
I was not trying to make a perfect reproduction, just approximate
the original shape. This is where one of those handy little gadgets
with the heavy base, easily positioned alligator clips and magnifying
glass really pays for itself, holding the fin in position till
the glue dries (several hours for this stuff). |
 |
Step 4. Attach Support and Linkage Arms
The final piece of manufacturing was to make up a couple of strips
to replace the 2 support/linkage arms coming from the top left
and bottom right of the fin. I cut out little sections in the
fin where they joined to strengthen the joins, rather than relying
on a flat join. |
 |
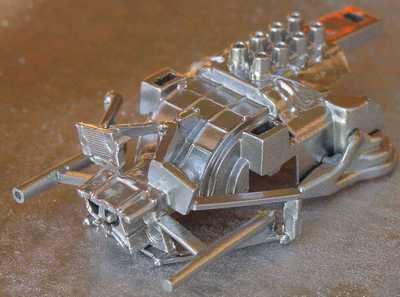
Step 5. Spray with a Chrome finish Paint
Unfortunately, unless you have access to chrome plating equipment,
the closest you can come to a chrome finish is a good quality
spray paint. At least it makes it look like a single piece again. |
 |
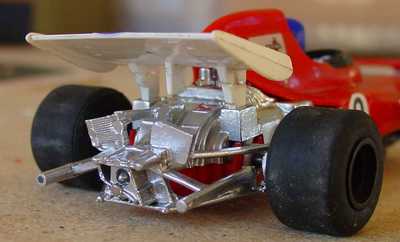
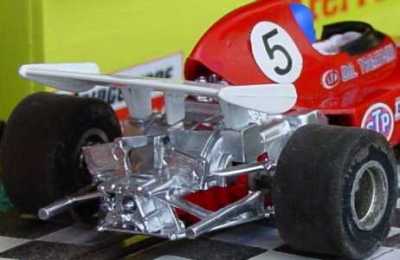
| The finished product - installed! |
 |
| What it should look like (My only other complete one) |
 |

|